Let's Chat!
Tailoring the right solution for each business is what we are passionate about. Based on an initial chat with you, we'll be able to prepare a unique proposal for you and your business. We are based in Brisbane
Take a moment to connect with us using the form below, or call us directly on:
1300 255 337 (Mon. to Fri. 10 am - 4 pm):
If you sell a set range of products or services to your customers, you can set up "Items" in Xero to contain the description, price, sales account and tax rate for each service or product. The "Items" can then be used over and over again, to efficiently create invoices in Xero.
A good example, would be a service either charged at an hourly rate, or a packaged price. An Item could be created in Xero for this type of service, so that each time an invoice is required, all you would have to do is select the Item from the drop-down Item list from within the Xero invoice. Once selected, the Item will auto-populate the line within the invoice.
Let's have a look at how to create an Item, from within an Invoice in Xero:
Firstly, create a new invoice in Xero. From within the Invoice, click on the drop-down arrow within the Item section and click + New Item:
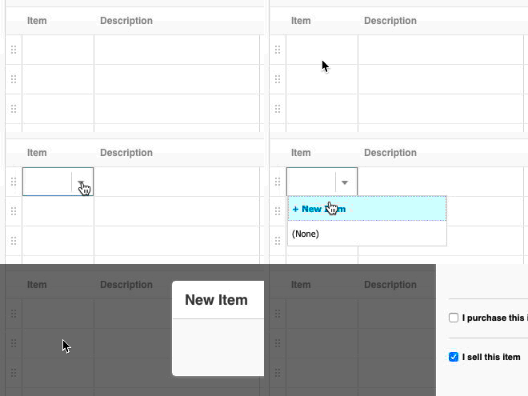
A New Item box will pop up on your screen. Enter the following data:
- Item Code: This needs to be short so you can enter it quickly.
(This field will not be displayed to customers). - Item Name: This needs to be short but meaningful, so you can search for it within the Item drop-down list. (This field will not be displayed to customers).
- Untick I track this item, because the service you are selling is not a stock item.
- Untick I purchase this item, because you are not tracking cost of good sold for services.
- Tick I sell this item, and enter the following details:
- Unit Price
- Sales Account
- Tax Rate
- Description: This field needs to be populated with the information that you want your customers to see on the invoice. It's a good idea to enter some basic information, which will then prompt you to customise the final wording at invoicing stage.
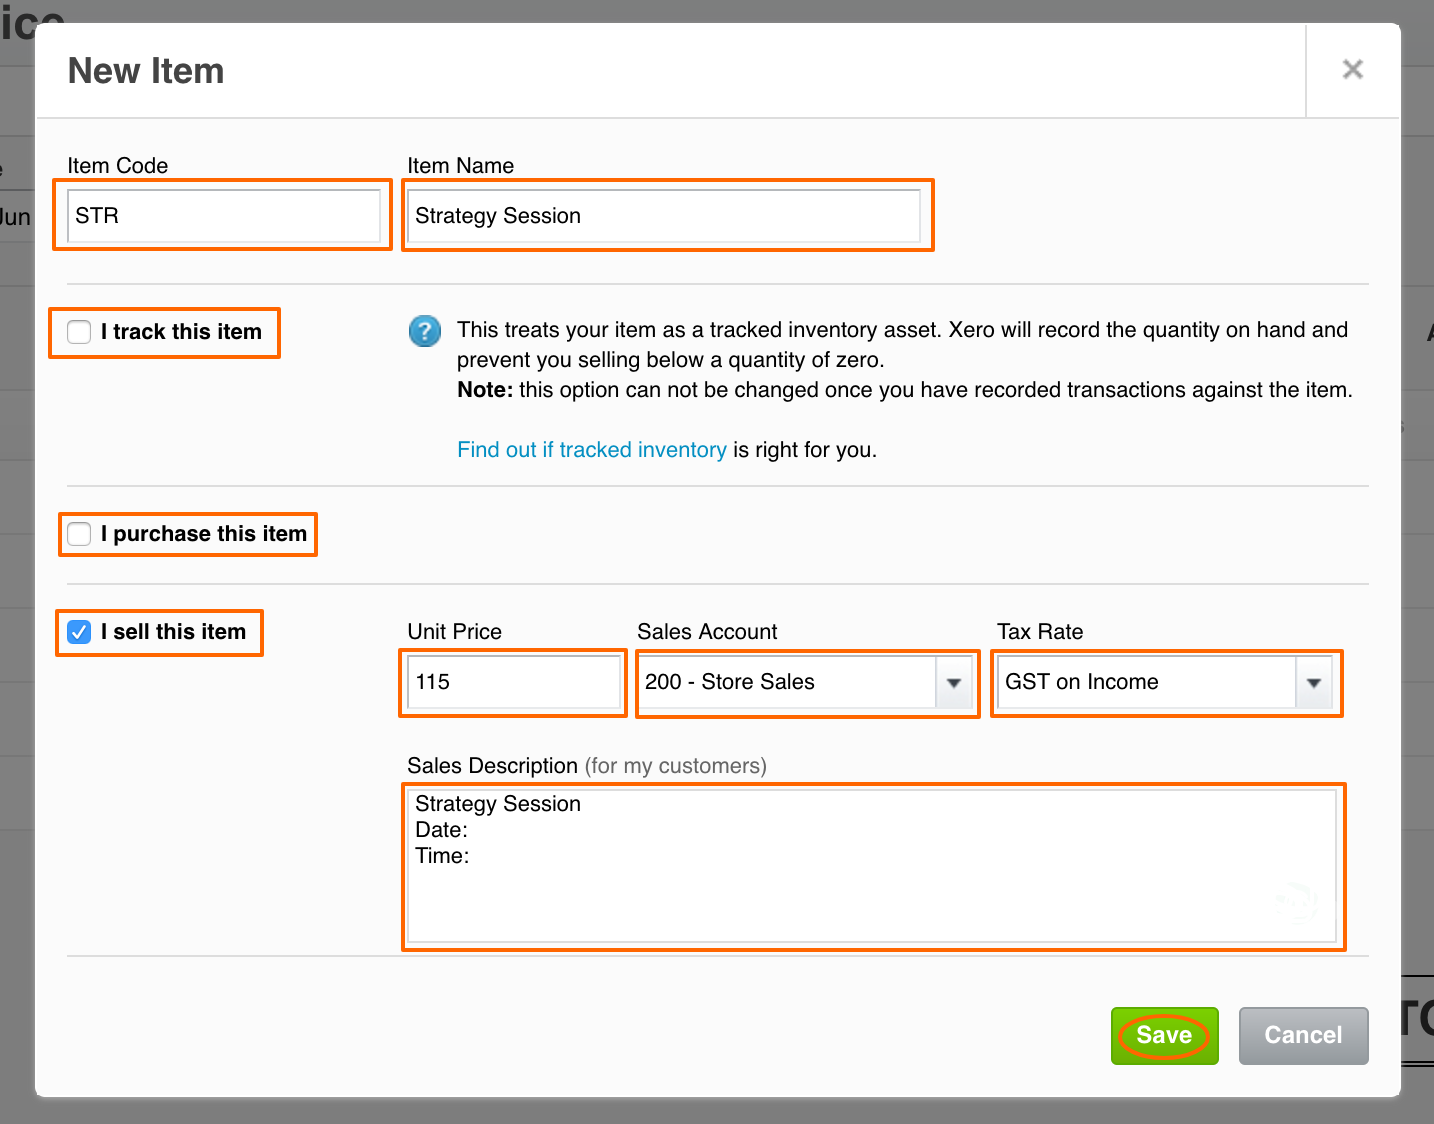
Click Save. The newly created Item will then auto-populate within the Invoice.
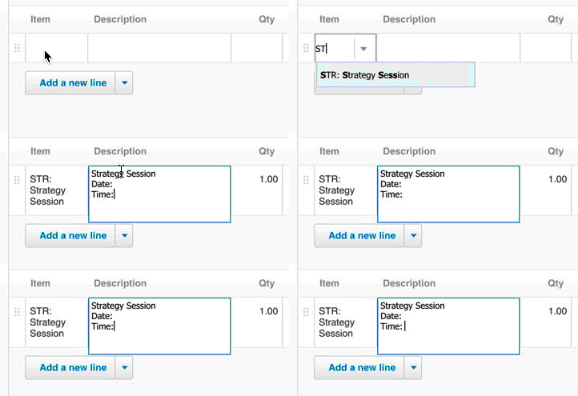
In the future, you can choose the Item from the dropdown list:

Or, you could type in the Item Code, and press Tab for a faster result.
Editing Items
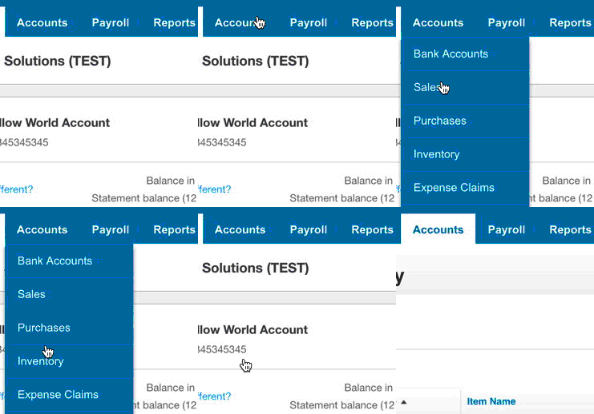
In order to edit existing Items, go to Accounts / Inventory:
Click on the item that you want to edit:
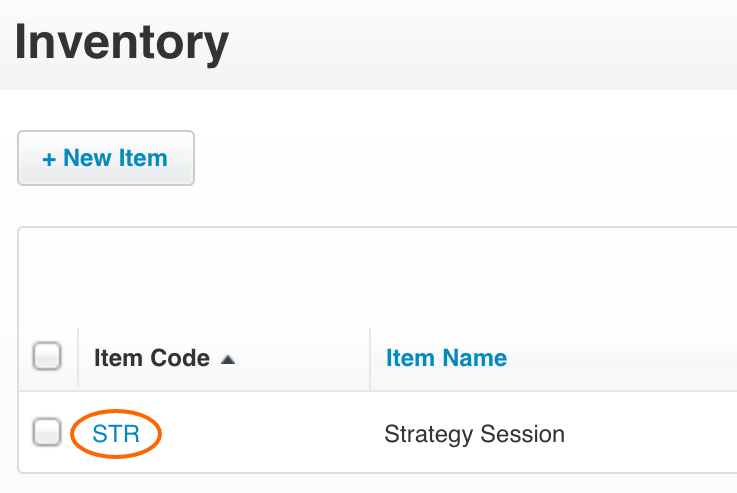
Click Edit Item, update the information as required and then Save.

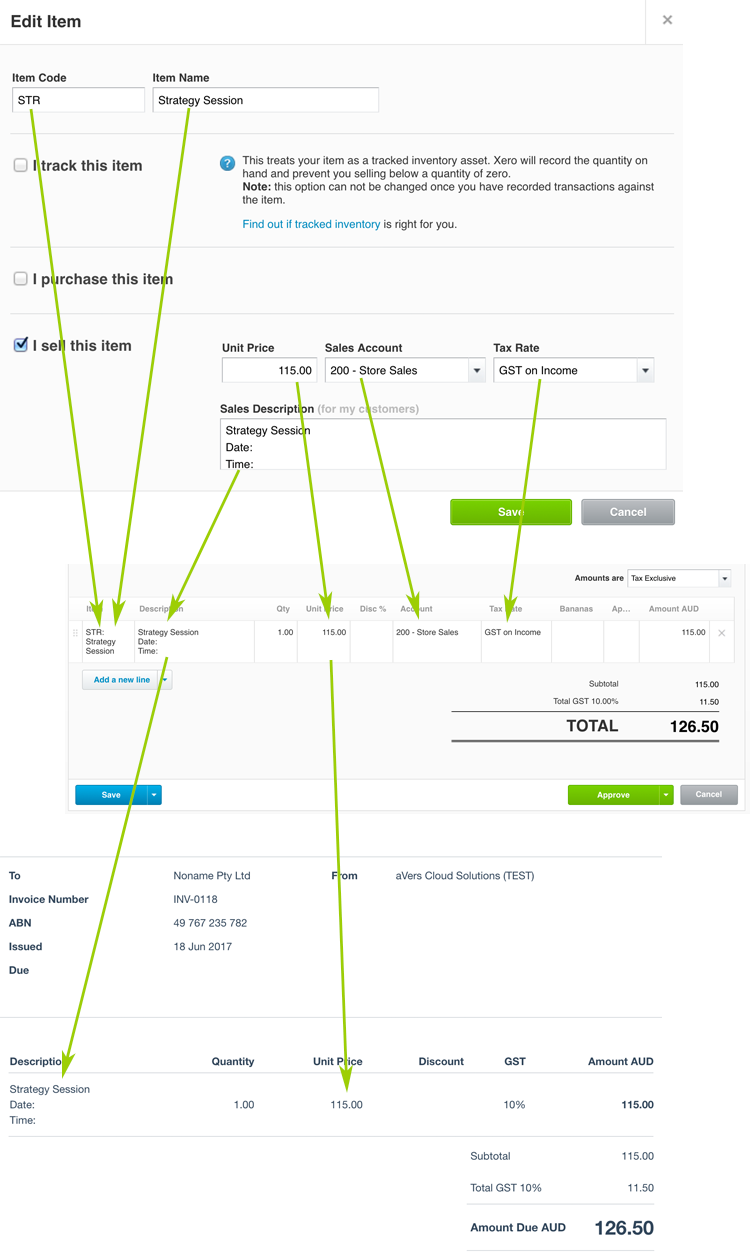
The diagram below illustrates how the fields from the Edit Item screen flow into the Xero invoice when the Item is selected from the dropdown list.

Subscribe by email and instantly get FREE Illustrated eBook. Adequate ‘positive’ cash flow is essential for the survival of any business, yet this is something that over 50% of small business owners struggle to manage.


